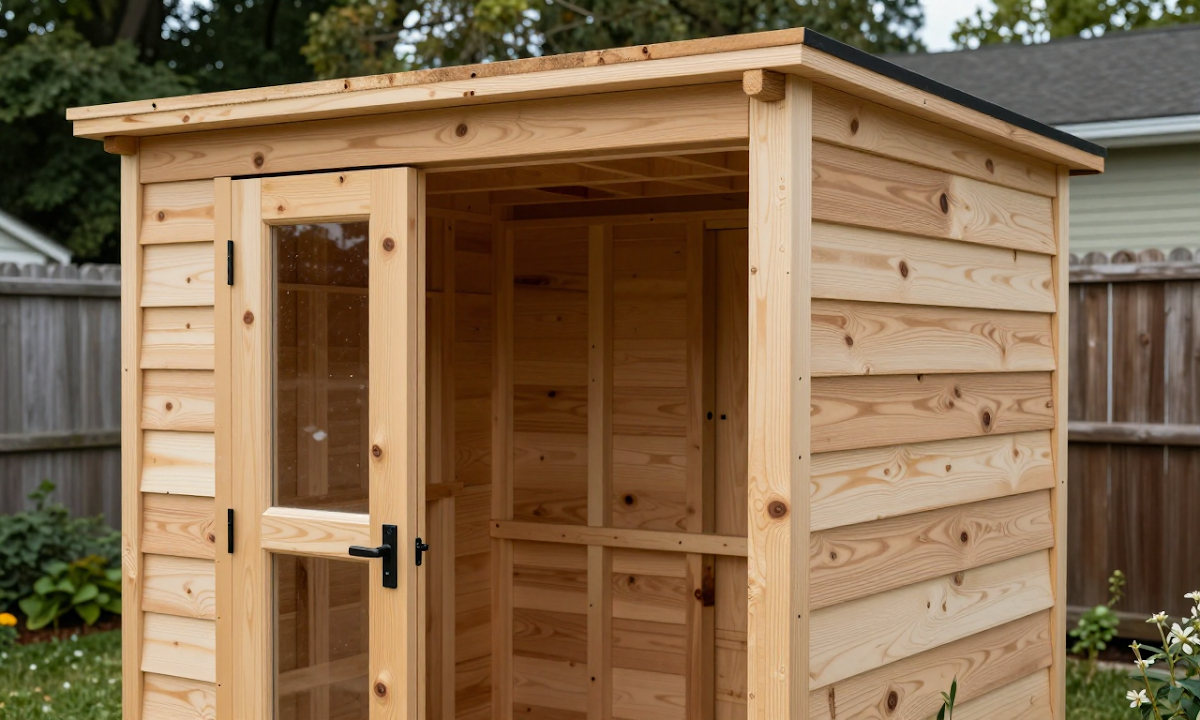
Custom Shed Timeline Delays From Electrical And Foundations

custom shed timeline delays: Standard Shed Construction Schedules

You have likely stared at your custom shed timeline delays wondering if your project is truly as delayed as it seems or if something was overlooked during planning. Many homeowners assume a 10x12 structure can be assembled in weeks, but hidden factors like specialized foundation types and electrical rough-in costs often extend the schedule significantly. This overview clarifies how custom plan modifications impact your DIY shed schedule impact, helping you set realistic expectations before breaking ground.

By understanding the coordination between trades and the specific time required for material lead times on custom orders, you can better allocate resources and manage stress during the build. These insights ensure your final outdoor structure remains a practical asset rather than a source of frustration.

In this article:

Standard Shed Construction Schedules

Most homeowners expect a standard shed to be ready in three to four weeks if they follow a straightforward path from permit approval to final finishing. Basic structures without electrical wiring, plumbing, or complex roofing systems can often move quickly through framing and enclosure stages. A typical schedule involves site preparation in the first week, followed by foundation work that usually takes two to three days for simple concrete pads or gravel beds. Framing, siding installation, and roof covering typically occupy the second and third weeks of construction.

Typical Weekly Breakdown

  • Week 1: Site clearing, utility locating, and excavation for footings or base preparation.
  • Week 2: Foundation pouring or leveling, followed by floor framing and wall assembly.
  • Week 3: Roof installation, siding application, and door/window fitting.
  • Week 4: Final inspections, minor repairs, painting, and cleanup.

This accelerated pace assumes you have all materials on hand and can dedicate consistent time to the project. Any deviation from standard plans introduces variables that extend the calendar significantly. For instance, ordering pressure-treated lumber or special-grade siding often requires waiting for delivery slots that may not align with your availability. Local weather conditions also play a major role; rain delays foundation curing while heat waves force breaks during exterior work.

The introduction of specialized features like electrical systems fundamentally alters this rhythm. Adding outlets for tools or lighting demands coordination between the framer and an electrician, which can pause progress until rough-ins are inspected. Without these custom upgrades, a beginner might finish framing and roofing within ten to fourteen days but should still plan for two weeks total to ensure quality weatherproofing and finishing touches.

Electrical Rough-In Impact On Duration

Adding electrical systems to your project significantly extends the build duration due to regulatory requirements and technical complexity. This work involves running power lines, installing outlets, and ensuring safety compliance before any final finish can be applied.

Inspection Requirements Add Time

Electrical rough-in is not a DIY task you can hide behind drywall; it requires official approval from local authorities before the project moves forward. A licensed electrician must install all wiring according to code, and a certified inspector will visit the site to verify safety standards are met.

  • Scheduling Delays - You cannot proceed with interior finishing until this inspection passes. If the work fails or needs correction, you face additional waiting periods for re-inspection.
  • Potential Stop-Work Orders - Builders often pause framing or roof installation if electrical rough-in is behind schedule to avoid violating permit timelines.

The need for precise coordination means the project timeline becomes dependent on external schedules rather than just your own speed. Even with a perfect plan, waiting days or weeks between the electrician's visit and the inspector's approval creates unavoidable gaps in construction flow.

Rough-In Complexity Increases Labor Hours

Installing conduit, running cables, and setting up breakers requires specialized tools and skills that most beginners lack. This phase often demands professional intervention, which introduces a new layer of scheduling uncertainty into your original plan.

  • Crew Coordination - Electricians usually work during standard business hours and may not be available on weekends or holidays when you might expect progress.
  • Material Availability - Specific electrical components like weather-resistant breakers for outdoor units can have long lead times, further delaying the rough-in phase.

Misaligned wiring during this stage often results in costly rework later. The time invested now prevents expensive fixes down the road but requires careful planning to avoid bottlenecks in your overall schedule.

Specialized Foundation Requirements And Time

Choosing a foundation type significantly influences when your custom shed can be occupied, often creating unexpected hurdles for beginners. While standard concrete slabs are common, specialized foundations like pressure-treated skids or engineered footings may be required by local codes or specific site conditions.

Standard Slab Versus Raised Foundations

A full-depth concrete slab is the most permanent option but requires a longer curing period before walls can be erected. This method typically adds two to three weeks to your project schedule compared to raised foundations, which allow for immediate construction once the base dries.

  • Conecrete Slab - Requires excavation and pouring of 4 inches or more; needs 28 days minimum for full strength.
  • Pressure-Treated Skids - Use 6x6 posts set in concrete with a gravel base; ready to build on within 3 to 5 days.

For custom sheds designed as workshops or garden studios, raised foundations often offer better drainage and prevent moisture wicking into the floor. However, these structures require precise leveling during installation to ensure shed walls remain square over time.

Site Specific Engineering Needs

Specialized foundation types like pier-and-beam systems are essential on uneven terrain or areas with poor soil drainage. These foundations involve setting concrete piers at specific intervals, which can delay the project if soil testing reveals unstable ground conditions requiring deeper excavation.

When planning a custom shed timeline, account for potential delays in ordering specialized materials like galvanized steel beams or engineered wood posts. Custom plan modifications to accommodate these requirements should be finalized before purchasing foundation components to avoid costly changes later.

Material Lead Times For Custom Orders

One of the most frequent causes of project setbacks involves material lead times, particularly when a homeowner selects premium lumber, custom fixtures, or specialized foundation components not stocked at local hardware stores.

Lumber and Sourcing Variations

  • Dry Lumber Availability - Custom plans often specify kiln-dried wood to prevent warping; this material frequently requires pre-ordering rather than immediate pickup.
  • Standard framing lumber is usually in stock, but higher-grade or specific species like cedar for siding may take 3-5 weeks.
  • Custom Millwork - If the design calls for unique doors, windows, or built-in shelving not available off-the-shelf, fabricating these items adds significant time to your schedule.
  • Ordering pre-cut framing or custom joinery often necessitates a 2-week wait for production and shipping.

Beginners should account for these variables by checking supplier stock levels before finalizing their budget.

Foundation Material Constraints

  • Precast Concrete Blocks - While standard concrete blocks are widely available, specialized foundation types like precast concrete piers or engineered footings often require ordering from specific manufacturers with extended shipping windows.
  • These items may arrive in 4-6 week increments depending on the supplier's current production schedule.
  • Steel Post-Base Systems - For raised foundations using steel posts, galvanized base plates and anchor bolts are essential for weatherproofing and stability.
  • These specialized connectors often require a minimum order quantity or lead time of 10-14 days.

Selecting materials that align with local inventory availability can prevent costly delays in your overall timeline.

Mitigating Supply Chain Risks

  • Budget for Contingency Time - Always build a buffer of 2-4 weeks into your custom shed schedule to accommodate unexpected shipping or manufacturing delays.
  • Weather can also impact delivery routes, further extending the time required for materials to arrive on site.
  • Verify Specifications Early - Confirming exact dimensions and material grades with suppliers before purchasing ensures that returns or exchanges do not occur later in the process.
  • Misordered components are difficult to replace quickly, especially if they are custom-cut or specialized structural elements.

Poor planning regarding material availability is a common source of frustration for DIYers who underestimate how long specific items take to arrive.

Coordination Between Trades And Builders

When coordinating a custom build, timing between trades often determines whether your project finishes on schedule or slips into the next season. Electricians typically need to rough in wiring before drywall goes up and after the roof is watertight, while foundation specialists must pour concrete pads or footings well before framing begins. If these tasks are not scheduled correctly, you may find carpenters waiting idly for a foundation crew that has been delayed by weather or material shortages.

Scheduling The Foundation First

The foundation is the anchor of your structure and must be completed before any walls go up. Specialized foundation types like frost-protected shallow foundations or helical piers require precise installation by professionals who understand local soil conditions. A typical 10x12 shed needs a level, stable base that can support heavy shelving units without settling over time.

  • Contact your local utility company before digging to locate underground lines.
  • Order concrete mix and form lumber at least two weeks in advance of needed dates.
  • Schedule the pour for dry weather when possible to prevent curing delays.

Once the foundation is set, the framing team can begin erecting walls without worrying about structural instability. However, if you plan to add electrical outlets inside your workshop, the electrician must visit after the frame is up but before interior finishes are applied.

Managing Electrical Rough-In Work

Electrical rough-in costs vary depending on how many circuits, switches, and lighting fixtures you require. For a basic tool shed with one outlet per wall, an electrician might need only half a day of work. More complex projects involving dedicated circuits for power tools or HVAC systems will take longer.

  • Map out all light switch locations on your blueprint before calling the electrician.
  • Show them where you want outlets placed so they can run wires through studs efficiently.
  • Ensure the rough-in is inspected and approved before closing up walls.

If the electrician arrives too early, there may not be enough framing to work around. If they come too late, access becomes difficult once insulation or drywall is installed. Clear communication between you, your carpenter, and your licensed tradesperson helps prevent costly rework or timeline delays.

Frequently Asked Questions

How much longer does an electrical rough-in add to a shed build?

An electrical rough-in typically adds three to seven days to your custom shed timeline delays, depending on local permit wait times and inspector availability. This phase involves running wires from the main panel before walls are closed in, so scheduling it early avoids rushing tradespeople during peak construction weeks.

Can I install electricity myself on a custom shed plan?

You generally cannot legally or safely install electrical wiring yourself without being a licensed electrician. Electrical rough-in costs include hiring a pro to run lines from your main panel to the shed and install outlets, switches, and lighting fixtures to code. Attempting this DIY can void insurance, fail inspections, and create fire hazards, so budget for professional installation when planning your custom shed timeline delays.

What are the most common delays in specialized foundation projects?

Common delays stem from soil conditions requiring specialized excavation or unexpected utility relocations during electrical rough-ins. DIY schedules often slip when permits for custom plan modifications take longer than expected to secure. Ensure site preparation and foundation curing times align with your overall project timeline.

Final Thoughts

Managing a custom shed timeline requires realistic expectations for electrical rough-in costs, specialized foundation types, and material lead times. These factors often extend the DIY shed schedule impact beyond initial estimates, especially when coordinating trades.

Plan For Overlapping Delays

  • Foundations may take longer than expected if soil conditions require specialized techniques or extended curing time.
  • Electrical work depends on utility availability and permit inspections, which can create bottlenecks independent of construction progress.

Flexibility in your schedule allows you to absorb these interruptions without compromising the final build quality.

Verify Custom Plan Details Early

  • Review all custom plan modifications before breaking ground to avoid costly mid-project changes that stall momentum.
  • Ensure material orders align with foundation and framing schedules to prevent idle time for workers or equipment.

Understanding how custom shed timeline delays occur helps you prepare a robust strategy that keeps your project moving forward steadily despite unforeseen hurdles.

Share:

Customizing Lean To Shed Plans For Small Corners

lean to shed plans small corners: Selecting The Right Corner Location For Your Shed

Many homeowners struggle with wasted space in tight spots around their property where a standard structure simply won't fit. This guide helps you modify lean to shed plans small corners effectively by adapting designs for compact areas and difficult angles. You will learn how to maximize storage potential while keeping costs low through smart framing and foundation adjustments.

Whether you need a quick workshop or extra garden storage, these customizations ensure your new build integrates seamlessly with existing structures without compromising stability.

In this article:

Selecting The Right Corner Location For Your Shed

Before committing to a specific spot, walk your potential area to identify flat ground free from roots, rocks, or significant slopes that would make installation difficult. Uneven soil requires extensive grading or additional leveling materials, which increases cost and labor for a project meant to be budget friendly.

Evaluating Sunlight And Drainage

Assess sunlight exposure by observing the site throughout the day to ensure adequate light if you plan to use the space for hobbies like painting or gardening. Positioning a compact shed design in a shaded area can make it cooler in summer, but too much direct sun may dry out stored wood or fade finishes prematurely.

Check drainage patterns by looking at where water flows after heavy rain; avoid placing the structure directly over low spots where water could pool under the floor. Poor drainage leads to rot and structural instability, so ensure your chosen site sits slightly higher than the surrounding ground to allow water to flow away naturally.

Considering Access And Existing Structures

Determine how much space you need for a ladder or small hand truck to access the shed without damaging nearby landscaping. Even in tight spots, maintaining at least three feet of clear walkway around the door ensures safe entry and exit while keeping tools organized.

Measure distances to existing walls, fences, or utility lines carefully; code often requires minimum setbacks from property lines to prevent disputes later. Verify local regulations regarding proximity to neighbors or easements before finalizing your site layout for a corner shed framing setup that respects legal boundaries.

Planning For Future Needs

Think about how the space might evolve; select a location that allows for potential expansion if you decide to upgrade shelving or add more storage later. A well-chosen site today can prevent costly relocation problems down the road, especially when working with lean to shed plans small corners.

Finally, mark your chosen perimeter clearly with stakes and string to visualize the footprint against existing features like fences or driveways. This simple step helps confirm dimensions and ensures your new structure fits seamlessly into your backyard ecosystem without compromising utility lines or stable ground.

Adjusting Foundation Dimensions To Fit Tight Spaces

When placing a structure in a tight corner, standard footings often cannot fit without removing existing landscaping or disturbing neighbors' property lines. You must modify your foundation strategy to accommodate narrow gaps while maintaining structural integrity for the sloping roof and upper walls.

Using Pressure-Treated Skids For Narrow Sites

  • Pressure-treated 4x4 skids are ideal for small spaces where a full concrete slab is impractical due to depth or width constraints. These skids act as elevated beams that distribute the shed's weight directly into the soil, preventing water damage from ground moisture.
  • You can adjust the length of each skid to match the exact width of your available gap, ensuring no part of the foundation extends over prohibited areas like sidewalks or shared fences.
  • This method allows you to build on uneven terrain without extensive excavation, saving both time and money compared to pouring a monolithic slab.

Pouring Concrete Piers For Maximum Stability

  • If the soil is loose or rocky, replace full skids with individual concrete piers set at critical load points like corners and beam ends. This approach requires less material and provides a solid anchor for heavy framing components.
  • Dig holes about 18 inches deep to reach stable ground, then pour high-strength concrete into the forms around your 4x6 or 6x6 posts.
  • Ensure piers are placed directly under structural members to prevent sagging over time, which is a common failure point in custom corner builds.

Checking Load Paths In Tight Confines

  • Regardless of the foundation choice, verify that vertical loads transfer straight down through posts and beams without hitting hidden underground pipes or obstacles. A helper can probe the ground with a metal rod before digging to avoid accidental strikes.
  • In very narrow gaps, you may need to angle your support beams slightly inward from the exterior wall to create necessary clearance for post placement.
  • Always check local codes regarding minimum foundation depths and frost line requirements, as building in a corner does not exempt you from these safety standards.

By carefully tailoring your footing system to the specific width of your site, you can successfully construct a durable storage solution that fits perfectly into limited areas.

Framing Walls With Reduced Depth For Corners

When framing a lean-to shed in a tight corner, standard wall depths can be problematic due to limited swing space for doors and awkward access to roof rafters.

Using Closer Stud Spacing

  • Increase stud frequency from the usual 16 inches on center to 12 inches or even 8 inches on center at critical junction points where walls meet existing structures.
  • Closer spacing significantly boosts lateral rigidity, preventing the wall frame from bowing under wind loads without requiring extra bracing hardware.
  • This approach is essential for small space storage applications where structural stability must be maximized within minimal footprints.

Shorter Wall Panel Sections

  • Instead of one continuous long run, break exterior walls into shorter segments that align with the roof rafters to create a more secure connection between vertical and sloping elements.
  • Use 2x4 studs for standard height walls in compact designs, but switch to 2x6 or 2x8 framing if local codes demand higher snow loads on the sloped roof.
  • Shorter panels are easier to lift and position solo, making corner shed framing much safer and faster than dealing with oversized lumber pieces.

Reduced depth walls also help when integrating ventilation or access in small designs by allowing you to shift door jambs closer to the existing house wall.

Beginners should ensure all nails are galvanized exterior fasteners rated for outdoor use, as moisture can quickly degrade standard wire nails. Always check local building codes before finalizing your framing layout, especially regarding wind resistance requirements for attached structures. If you lack a helper, plan extra time to lift shorter wall sections carefully using the circular saw and drill/driver to secure connections incrementally.

Taking these steps ensures your corner shed maintains structural integrity while fitting perfectly into challenging backyard spaces without compromising safety or budget friendly goals.

Integrating The Roof Slope Into Existing Structures

Securing the roof to a permanent structure like a house wall, garage side, or sturdy fence is essential for stability, especially when using compact shed designs in tight spaces. Unlike standalone frames that rely on multiple points of support, this configuration transfers wind loads directly into your home's structural framing, reducing the risk of the entire unit toppling over during storms.

Connecting To House Walls

  • Ensure the exterior wall of your house is load-bearing and structurally sound before attaching shed components to it. You may need to consult a local professional to verify that adding this weight will not compromise the home's foundation.
  • Use long lag bolts or structural screws rated for outdoor conditions to anchor the ledger board directly into the house studs. This connection must be rigid enough to resist lateral movement caused by strong winds pushing against the sloped roof.
  • Apply a generous bead of exterior-grade sealant along the bottom edge of the roof framing where it meets the house wall. This creates a weather-tight barrier that prevents water from seeping into your home's interior during rain or snow events.

If you are building in small space storage scenarios, precision is key because there is no room to adjust for shifting foundations later on. The roof slope typically angles downward away from the house wall toward a free-standing support at the far end of the structure.

Attaching To Fences

  • When leaning against a wooden fence, verify that it was built with substantial posts and rails rather than lightweight pickets. A standard 4x4 post may not be strong enough to handle the combined weight of the shed roof and accumulated snow.
  • If the existing fence is weak, reinforce it by screwing additional vertical 2x4s into the ground next to or through the current posts before installing your ledger board. This upgrade ensures the connection point can withstand long-term stress without rotting or loosening over time.
  • Consider adding steel brackets between the shed framing and the fence wood to distribute pressure evenly. This prevents the roof structure from pulling away at a single weak point as the wind shifts direction.

Always check your local building codes regarding attachments to residential structures, as some municipalities require specific engineering stamps for these modifications.

Installing Ventilation And Access In Small Designs

Proper airflow is essential to prevent moisture buildup, mold growth, and wood rot, especially when you are working with compact shed designs tucked into tight spaces. In small corner applications, traditional large vents often cannot fit without compromising the structural integrity of the frame or creating a security risk. You must select ventilation solutions that provide sufficient exchange while maintaining the rigidity required for your lean-to framing.

Selecting Appropriate Vents

  • Install small louvered vents near the eaves on both the existing wall and your new frame to encourage cross-ventilation without needing large openings. These narrow slats allow air to pass through while keeping rain, debris, and pests out of the interior space.
  • Place a higher vent in the gable end or under the roof overhang to create an updraft that pulls stale air out naturally. Positioning these near the ridge line helps remove heat and humidity more effectively than vents placed low on the wall.
  • Consider using screened attic vents if you plan to store items like hay or firewood, as they block insects while still allowing moisture to escape. Ensure all vent covers are galvanized steel or aluminum to resist rust in outdoor conditions where rainwater often runs down nearby surfaces.

Designing Access for Tight Spots

  • Choose a narrow door width, such as 24 inches or 30 inches (61 cm or 76 cm), which fits comfortably in corner constraints while still allowing access to stored items. A smaller footprint reduces the amount of framing material needed and simplifies installation around existing structures.
  • Utilize sliding doors instead of swinging ones if space is extremely limited on either side of the opening. Sliding mechanisms require less clearance for operation and prevent the door from colliding with your house or fence when opened.
  • Install a sturdy hasp lock system near the top of the frame rather than relying solely on hinges for security. This placement keeps the lock out of reach of children and makes it harder for intruders to pick or force open the door.

When cutting openings in your 2x4 studs, always reinforce the header above the vent or door with a double layer of lumber to preserve load-bearing capacity. Use galvanized exterior fasteners for all hardware exposed to weather, ensuring long-term durability against moisture and temperature changes common in backyard environments.

Final Thoughts

Successful implementation of lean to shed plans small corners relies on selecting a location that accommodates the roof slope while ensuring adequate clearance from your home.

Maximize Space Efficiency

Compact shed designs utilize available footprint by integrating the structure against an existing wall, which naturally reduces material requirements and overall cost.

Simplify Construction Logic

  • Corner shed framing benefits from reduced stud counts where walls meet existing structures.
  • Fewer components mean faster assembly and lower risk of error for DIY builders.

With careful planning, you can achieve a functional storage solution that fits perfectly into tight backyard areas without compromising structural integrity or budget.

Share:

Materials Needed for 12x24 Shed Construction

shed building materials: Introduction to Materials Needed for Shed Building

If you're planning to build your own shed but aren't sure where to start when it comes to materials, this guide is for you! We’ll cover everything from selecting wood that's right for your project to choosing suitable metal roofing and insulation options. You'll also learn about the importance of concrete blocks in providing a solid foundation for your shed and discover which tools are essential for getting the job done efficiently. By the end, you should have a clear idea of what materials you need for 12x24 shed construction.

In this article:

Introduction to Materials Needed for Shed Building

To build your 12x24 shed successfully, several key materials are essential to ensure both structural integrity and functionality over time. This guide will cover the core components required for this project.

Wood Selection and Specifications

For framing, you'll need high-quality wood such as pressure-treated pine or treated hardwoods like redwood or cedar. These materials are treated to resist moisture damage and insects. The choice of wood depends on your climate and intended use for the shed: pressure-treated pine is ideal in most regions due to its durability and affordability.

Metal Roofing Options

Metal roofing, such as galvanized steel or aluminum, offers several advantages over traditional shingles. It's more resistant to weather conditions like wind, snow, and hail, making it a durable option for your shed roof. Galvanized steel is particularly good at resisting corrosion, while aluminum provides an attractive finish that can complement various design styles.

Insulation Choices

To enhance energy efficiency and maintain a comfortable indoor temperature year-round, adding insulation to the walls of your 12x24 shed is crucial. Options include fiberglass batts or loose-fill cellulose for walls. For floors, options vary from simple dirt or gravel to more advanced insulating materials like foam board.

Concrete Blocks for Foundation

The foundation of your shed will be built using concrete blocks. These provide stability and are resistant to moisture. You'll need to measure and level the ground before placing the blocks, ensuring they are securely seated with mortar if needed. This step is crucial for long-term structural integrity.

Tools Required for Shed Building

To successfully build your 12x24 shed, a variety of tools will be necessary. Essential items include a hammer, saw (preferably a circular or reciprocating saw), measuring tape, level, drill with bits, and safety gear like goggles and gloves.

Wood Selection and Specifications

For shed construction, choosing the right wood is crucial for durability and longevity. Here are some types of wood commonly used in building sheds along with their characteristics:

  • Pressure-Treated Wood: Often referred to as PT wood, it's treated with chemicals that make it resistant to rot, pests, and decay. It’s a popular choice due to its cost-effectiveness but may not be suitable for direct contact with the ground.
  • Redwood or Cedar: These are excellent choices for sheds because of their natural resistance to insects and fungi. Redwood is particularly durable in wet environments while cedar is known for its beauty and resistance against decay, making it ideal for both functional and aesthetic purposes.
  • Douglas Fir: A common choice due to its strength and stability. It's a good option for load-bearing structures like shed walls and floors. However, it may require more maintenance than other types of wood over time.
  • Pine: Often cheaper than redwood or cedar, pine is widely used in sheds as lumber that’s relatively easy to work with. Pine tends to expand and contract with changes in humidity but can be treated to improve its durability.
  • Lumber Grades for Shed Construction:
  • No. 1 S4S (Select Structural): Offers the best appearance, minimal knots or defects, and is preferred for load-bearing applications.
  • No. 2 S4S: Good quality lumber that’s suitable for most structural components of a shed.
  • No. 3 S4S: A little less refined than No. 2 but still durable enough to be used in many construction projects.

When choosing wood, consider not only the type but also its cost and how it will perform over time based on your local climate conditions. Proper planning and proper selection can significantly enhance the longevity of your shed while keeping costs under control.

Metal Roofing Options

Metal roofing is a popular choice among shed builders due to its durability, longevity, and energy efficiency. There are several types of metal roofing materials available on the market, each offering unique benefits.

Firstly, galvanized steel is widely used for its affordability and resistance to rust. Galvanized steel roofs come in various finishes like smooth, ribbed, or textured, which can add aesthetic appeal while providing protection from moisture damage. Installation usually involves securing metal sheets over a wooden sub-roof using screws or roofing nails.

Another option is aluminum, known for its durability and low maintenance requirements. Aluminum roofs are lightweight yet strong, making them easy to handle during installation. They also offer excellent resistance against corrosion and pests like termites. However, aluminum sheets may need flashing around windows and doors to prevent water penetration.

Copper roofing stands out with its beauty and lasting value but is the most expensive among metal options. Copper's natural patina develops over time, adding a rich color that enhances the appearance of any shed. It is also highly resistant to corrosion due to its inherent copper content. Copper roofs require special attention during installation as they are sensitive to temperature changes.

Lastly, zinc provides excellent resistance against corrosion and has a longer lifespan compared to other metals like aluminum or steel. Zinc-coated roofing sheets have a smooth surface that can be painted over for aesthetic enhancement while offering good protection from UV rays.

The choice of metal roofing depends on your shed's size, location, budget, and specific needs such as durability and maintenance requirements. Regardless of the material chosen, it is crucial to ensure proper installation techniques by hiring professionals or consulting with experts in shed building materials before commencing any project. This will guarantee a safe and functional structure that lasts for years to come.

Insulation Choices

When constructing a 12x24 shed, proper insulation is crucial to ensure energy efficiency and comfort inside your structure. Choosing the right type of insulation will help reduce heating and cooling costs by preventing heat loss in winter and heat gain in summer. There are several options available for insulating your shed, each with its own advantages depending on factors such as climate zone, budget, and maintenance requirements. Types of Insulation 1. Fiberglass: This is a popular choice due to its affordability and widespread availability. Fiberglass insulation can be blown into walls or installed between rafters using batts. It offers good thermal resistance but requires careful handling as it can irritate the skin and lungs. 2. Cellulose Insulation: This recycled material made from shredded paper has a high R-value per inch compared to fiberglass, making it an excellent choice for attics where it can be blown in between ceiling joists or attic rafters. It also helps improve air quality by absorbing formaldehyde and other volatile organic compounds. 3. Mineral Wool (Rock wool): This type of insulation is fire-resistant and very effective at preventing heat transfer, making it ideal for high-temperature environments like sheds in warmer climates. However, it's not as popular due to its higher cost compared to fiberglass or cellulose. 4. Polyurethane Spray Foam: This insulating spray foam is applied on-site as a liquid that expands and fills gaps quickly, creating an air-tight seal around the structure. It provides excellent thermal performance but comes with a high initial investment and can be challenging to apply without proper training or professional assistance. 5. Polyisocyanurate Foams: This type of foam is often used for cold climates as it performs exceptionally well in maintaining low temperatures. Its R-value is significantly higher than fiberglass, making it an excellent choice for heating efficiency but not as common due to its cost and complexity during installation. When choosing insulation for your 12x24 shed, consider the local climate, budget constraints, ease of application, and maintenance requirements. Always choose products with high R-values (indicating greater thermal resistance) to optimize energy savings.

Concrete Blocks for Foundation

Concrete blocks are essential components when it comes to building a solid foundation for your shed. They provide stability and longevity to the structure by distributing the weight evenly across the ground. When properly installed, concrete blocks can support even heavy structures without sinking or shifting.

Benefits of Using Concrete Blocks

  • Durability: Concrete is durable and resistant to moisture, pests, and weather conditions. This makes it an excellent choice for a shed foundation that needs to withstand various environmental elements.
  • Even Weight Distribution: Concrete blocks are designed to distribute the weight of structures evenly across their surface area. This prevents settling or uneven surfaces under your shed.
  • Elevating the Structure: By using concrete blocks, you can elevate your shed off the ground slightly. This not only provides better drainage around the foundation but also helps prevent moisture-related issues like mold and mildew buildup inside the shed.
  • Customizable Height: Concrete blocks offer flexibility in terms of height. You can choose from different thicknesses to create a solid base or adjust heights as needed for your specific design requirements.

Installation Process

  • Preparation: Ensure that the ground is level and free of debris before placing concrete blocks. You may need to compact the soil first if it’s not already stable.
  • Placement: Position each block carefully, ensuring they are aligned correctly and stacked properly for a strong foundation structure.
  • Securing: Use mortar or cement adhesive between layers of blocks to ensure stability. Consider adding rebar or metal ties at key points to add extra structural integrity if needed.
  • Leveling: Use levelers or bricks to keep the base even, ensuring that your shed will sit level and stable once it’s built on top of this foundation.

By choosing concrete blocks for your shed's foundation, you’re investing in a structure that not only looks good but also stands up well over time. With careful selection and proper installation techniques, concrete blocks can provide the sturdy base needed to support even larger structures like sheds or small garages.

Tools Required for Shed Building

To construct a 12x24 shed effectively, you will need a variety of essential tools that can help streamline your project while ensuring safety during construction. Here's a list of tools recommended for shed building:

  • Measuring Tools: A tape measure is crucial to ensure accurate dimensions and layout of the shed’s structure.
    • For more complex designs, consider using a laser level or electronic level for precise measurements across larger areas.
  • Different Types of Saws: Depending on your materials (wood, metal, etc.), you’ll need saws that are appropriate for cutting them. A circular saw is essential for cutting through thicker pieces of wood or metal. For thinner cuts, a reciprocating saw will come in handy.
  • Hammers and Nails: Essential tools for assembling the frame of your shed using nails or screws.
    • A framing hammer is ideal for driving nails into wood while maintaining precision.
    • Nail guns can be time-saving, especially when it comes to securing larger pieces together. However, they require a bit more skill to use effectively and safety training should always precede their usage.
  • Drills: Essential for drilling holes in the wood or metal components of your shed frame before you nail them into place.
  • Framing Squares:** These are vital for ensuring that each corner is square, which is critical to maintaining a stable and secure structure. If you're building with wood studs, this tool will come in handy repeatedly throughout the process.
  • Gloves: Protect your hands from splinters or cuts while handling tools and materials.
These are just some of the essential tools needed to build a 12x24 shed. Depending on the complexity of your project, you might also want to consider additional specialized tools that can make construction easier and more efficient. Remember, before starting any construction work, it's always important to ensure safety by using appropriate protective equipment and following proper techniques for using each tool.

Final Thoughts

To build a sturdy shed, you need to consider several key materials: wood for the structure, metal roofing for durability, insulation for energy efficiency, concrete blocks for stability at the foundation, and an assortment of tools necessary for construction.

The three most important takeaways are selecting high-quality wood, choosing proper insulation that suits your climate needs, and ensuring a solid concrete block base. Tonight, take one small first step: gather a list of all required materials so you can begin shopping or collecting them for your next shed-building project.

Share:

Step-by-Step Guide to Building a Shed

shed construction: Measuring the Site

Ever dreamed of having your very own shed but found yourself at a loss on how to start? Building a shed from scratch can seem daunting, but fear not! This step-by-step guide will walk you through each phase of constructing your dream shed—from measuring the site and marking boundaries to laying the foundation and starting construction. Whether you're an experienced DIYer or just beginning to plan for a new structure, this introduction aims to provide clear and practical advice that anyone can follow. By the end of this article, you'll have the knowledge and confidence to tackle your shed project successfully!

In this article:

Measuring the Site

To ensure that you build a shed in the perfect location, start by measuring your available space accurately. This step is crucial to determine whether the area has enough room for the shed without encroaching on other structures or property lines.

  • Mark Out Your Space: Use stakes and string to mark out the boundaries of the land you intend to use for your shed. For a more accurate measurement, consider using a measuring tape or surveying tool if you have access to one.

Once you have marked out the space, walk through it several times, ensuring that there are no obstacles such as trees, rocks, or ditches in its path. These can affect your final measurements and could also pose safety risks when setting up a shed foundation later on.

Estimate the Dimensions:

  • Length and Width: Measure both the length and width of the space you have marked out for the shed. This measurement should account for the total size of your intended structure, including any overhangs or additional features like a porch.

It's important to consider how much room will be needed around the sides of the shed for doors and windows as well as maintenance access. For example, if you plan on adding a door to one side, ensure there is enough space so that the door can swing open easily without hitting anything.

  • Depth: Measure how deep or wide your shed will be from front to back, including any additional features such as an attached garage or storage area. This measurement should also factor in the distance you want between the shed and other nearby structures like fences or walls.

Accurate measurements are critical not just for planning but also when ordering materials, laying out the foundation, and ensuring that your shed will fit within its designated space without causing any legal issues with neighbors or property lines.

Marking Boundaries

When embarking on your shed construction journey, accurately marking the boundaries of your site is crucial to ensure that everything aligns perfectly with your plans. This step involves using stakes and string to create a clear outline of where you intend to build. Firstly, gather several sturdy stakes—these can be wooden posts, concrete blocks, or even metal rods—and some strong, brightly colored string like orange or yellow. These colors are ideal because they stand out in various lighting conditions, making it easier for you and others involved to locate the boundaries clearly. Start by placing your first stake at one corner of the shed's planned footprint. Use a tape measure or a laser level to mark precise distances from this initial point along both axes. For instance, if your shed is 8 feet wide and 10 feet long, ensure you place stakes every foot to get an accurate outline. Next, use string to connect these stakes at the corners of each axis. Stretch the string tautly between adjacent stakes so that it remains as straight as possible. This creates a visual line that helps guide you during construction phases where precise measurements are paramount. It's also wise to double-check your work by measuring diagonally from one corner stake to the opposite corner, ensuring both sets of strings meet at this point. This method provides an additional cross-check for accuracy and ensures that no errors creep into your design due to slight misalignments. In summary, marking boundaries with stakes and string is a foundational step in any shed construction project. It ensures clear, accurate measurements which are essential for building a sturdy structure within the planned area.

Preparing the Ground

Preparing the ground is essential for successful shed construction as it sets the foundation for your project's stability and longevity. The first step involves clearing debris from the site thoroughly. This includes removing any vegetation such as grass, weeds, and bushes that could interfere with construction. Tools like a rake or a shovel can be helpful in this process. After clearing away all unwanted materials, the next crucial task is to level the soil. A simple method for this is using a spirit level and a long piece of wood or a leveling tool. This ensures that your shed will sit evenly on the ground, which is important for maintaining its structural integrity and preventing water pooling around the base. Once you have leveled the site, compacting the ground becomes crucial to ensure it is stable enough to support the shed's weight. Using heavy-duty machinery like a tamper or even foot traffic can help in this process. The aim here is not just to remove any remaining hollow spots but also to make sure that the soil is solid and level. These initial steps lay down the groundwork for your project, ensuring that everything is smooth sailing when you start building the shed itself. Remember, taking these preparatory measures seriously will save time and effort in the long run.

Materials Needed

To successfully build a shed, you'll need to gather essential materials that will ensure your project runs smoothly from start to finish. Here’s what you’ll typically require:

  • Wood: The primary material for constructing the shed's structure is wood. You can choose between softwood and hardwood depending on your requirements, such as durability or aesthetic appeal. Commonly used types include pine, cedar, and oak.
  • Nails and Screws: These are critical for fastening wooden components together. Nails come in various sizes suitable for different thicknesses of wood. Screws offer a more secure hold and are often preferred when assembling the shed's framework or installing siding.
  • Saw (or Power Tools): A saw is essential, whether you choose to use a handsaw, circular saw, table saw, or a chainsaw. For precise cuts, especially with wood framing, a power saw can be invaluable but remember to wear protective gear like gloves and goggles.
  • Tools: In addition to the saw, consider having other basic tools such as a hammer for driving nails into place, a level to ensure surfaces are even, a tape measure for accurate measurements, pliers for gripping smaller items or wire, and a drill for making pilot holes before screwing wood pieces together.
  • Foundation Material: Depending on your location’s climate conditions and local building codes, you may need materials like gravel, sand, or concrete for the shed's foundation to ensure stability during extreme weather events such as high winds or heavy rain.
  • Siding and Roofing Materials (Optional): If your shed design includes siding or a roof, you’ll need materials suitable for the climate in which it will be built. Common options include plywood or hardboard for siding, shingles, metal roofing sheets, or synthetic tiles for the roof.
  • Paint: For finishing touches and protection against weathering, consider having some paint to protect your new shed from wear and tear over time. Choose a color that complements its surroundings while also offering UV resistance which is important in preventing wood damage caused by prolonged sun exposure.

Gathering these materials well before starting construction will help streamline the process and ensure you have everything needed for each stage of building your shed. Make sure to check local regulations regarding building codes, permits, and restrictions on materials that might be necessary based on where you’re planning to construct your shed.

Foundation Planning

Deciding on the type of foundation is crucial in shed construction as it affects both stability and durability. The choice between poured concrete and piers depends largely on your site conditions.

Concrete Foundation

A concrete foundation is ideal if you have a flat, level area free from rocks or large roots that could compromise the structure's integrity. This type of foundation involves pouring concrete directly onto the ground to create a solid base for the shed. Ensure the concrete is properly compacted and cured before proceeding with the construction of your shed.

Pier Foundation

If you're dealing with uneven terrain, rocks, or shallow foundations, pier construction might be more suitable. This method involves setting piers (concrete columns) at strategic points under the shed's support posts. The piers provide a stable base that can withstand various soil conditions and prevent settling of your shed.

Regardless of which foundation type you choose, ensure it aligns with local building codes to avoid legal issues later on. Always consult with professionals if you're unsure about site-specific requirements or construction techniques.

Starting Construction

To begin constructing your shed, start with laying the foundation to ensure stability and a solid base for the frame. Choose appropriate materials such as concrete piers, pavers, or even wood depending on local building codes and soil conditions. For concrete piers, dig holes approximately 12 inches deep by 6 inches wide at each corner of your shed’s footprint. Mix the concrete according to instructions and pour it into the holes until they are filled to about an inch from the top.

Once the concrete has set (typically after a few hours), use rebar or steel reinforcement rods placed within the wet concrete for added strength. Ensure these bars extend above ground level by at least 8 inches, as this will serve as a foundation for your shed frame and help prevent settling over time.

Next, mark where you want to place each corner of the shed using stakes driven into the ground. This helps in aligning the frame accurately later on. Once all corners are marked, begin constructing the walls by attaching 2x4s or 2x6s at the base of these corners. Use galvanized nails for strength and durability.

If you’re building a lean-to shed against an existing structure, connect the two buildings with additional framing to create a continuous wall. This step is crucial as it ensures your new shed is structurally sound and securely attached to other buildings if applicable.

Finally, after completing the foundation and walls, attach a roof framework on top using trusses or rafters depending on design requirements. Secure these components well; proper alignment will prevent leaks during heavy rains. With the structure in place, you’re ready for siding, doors, windows, and finishing touches like paint to complete your shed.

Remember, careful planning ensures that your shed construction project is both successful and safe!

Final Thoughts

Your shed construction journey is about to begin! Here are three key steps you should keep in mind: Firstly, ensure your site is properly measured so that when you mark out your boundaries, everything fits perfectly within your yard. Secondly, think through what materials you need and where they will come from. A well-prepared list can save a lot of time and frustration during the construction process. Lastly, planning the foundation is crucial for stability. It’s important to choose the right type of foundation based on your soil conditions and the shed's intended use. Tonight, take just one small step: sketch out the basic outline of where you want your shed to be in your yard. This will give you a clear idea of how much space you need and what measurements are necessary.

Share:

Simple Shed Pictures for Backyard Storage Solutions

simple shed pictures: Backyard Storage Solutions

Simple shed pictures can transform your backyard into a storage haven without breaking the bank. Whether you're a complete beginner looking for DIY shed designs or just need some inspiration for small outdoor space solutions, this article offers garden shed ideas that are perfect for everyday use. Learn how to plan and build an efficient shed with practical advice on materials selection, step-by-step construction techniques, safety tips, and maintenance tricks.

In this article:

Backyard Storage Solutions

Maximize your backyard storage with these simple shed ideas! Whether you're looking to create extra space for gardening tools, outdoor gear, or just want to keep your backyard tidy, a small shed can be a fantastic addition.

1. Basic Storage Shed

Start by building a basic storage shed. Use pressure-treated lumber and galvanized nails to ensure longevity in the outdoors. A simple design with a pitched roof will keep your items dry. Measure 8 feet (2.4 m) x 6 feet (1.8 m), perfect for storing most garden tools and equipment.

2. Lean-To Shed

A lean-to shed is an excellent way to maximize vertical space in a small backyard. Build the shed against an existing structure, like a fence or a house wall, to save on materials and construction time. Use 1x4s for framing and 3/4-inch exterior plywood for walls. This design can fit into tight spaces and provides extra storage.

3. Garden Shed with Doors

If you have a larger space, consider building a garden shed designed specifically for gardening tools and plants. Use double doors to make it easy to access your items without carrying them through the shed itself. Frame with 2x4s and sheath with 1/2-inch exterior plywood.

4. Small Outdoor Space Solutions

For a more compact space, opt for a small outdoor storage container or an insulated mini-shed made from metal panels. These can be easily moved around your backyard and offer protection against the elements while keeping your items organized.

5. DIY Shed Designs with Simple Pictures

For visual inspiration, browse simple shed pictures online. Look for designs that fit well in your space and consider using modular pieces or pre-cut sections to streamline construction. Pinterest is a great place to find ideas and inspiration.

6. Tips for Maintaining Your Shed

Once constructed, regular maintenance will keep your shed looking good and functional for years. Apply a protective sealant on the exterior wood to prevent water damage and fading. Check the roof regularly for leaks or loose shingles.

These simple shed ideas should give you plenty of options for maximizing your backyard storage space. Happy building!

Garden Shed Ideas

Discover creative designs that fit any backyard, from small to large spaces.

For a cozy corner garden shed, consider a lean-to design. This simple structure attaches to your house or fence, offering space for tools and gardening supplies without taking up additional yard area. Choose lightweight materials like cedar wood for the exterior siding; its natural oils help resist decay in outdoor environments. Opt for vinyl or shingle roofing to keep maintenance low.

If you have a larger backyard, think about a traditional shed with gabled rooflines. This classic design provides good storage space and an easy way to add doors on one side or two sides if access from both directions is needed. Use pressure-treated lumber for the frame as it can withstand moisture in the ground contact areas and is termite-resistant.

For a modern look, go for a shed with clean lines and perhaps an A-frame roof design. This style offers versatility—choose between wood or metal siding to suit your aesthetic preferences. Metal roofing is a good choice if you live in a region prone to heavy rains, as it can handle the weight better than shingles.

For those with a bit more space, consider adding a loft to maximize vertical storage. A loft can be reached by a ladder and provides great access for storing items that need protection from the elements or frequent use. Incorporate small windows at the top of the walls to allow light into the loft area while maintaining privacy.

No matter which design you choose, remember to measure your backyard carefully before purchasing materials. Ensure there is enough space around the shed to open doors and allow for maintenance tasks without tripping over extension cords or other hazards. For a more sustainable approach, think about using reclaimed wood from local salvage yards if you want to add character while also being environmentally conscious.

These garden shed ideas are just the beginning of what's possible with your own backyard. With careful planning and attention to detail, any space can become an inspiring storage solution for your gardening tools or outdoor activities.

To make your dream garden shed a reality, follow these detailed steps:

  1. Site Selection and Planning: Choose an area with good drainage that receives plenty of sunlight. Clear the area of debris and vegetation. Measure the space to ensure it aligns with your design plans.
  2. Foundation Preparation: For a lean-to shed, dig holes for concrete footings if the ground is unstable or uneven. Lay out skids (pressure-treated 4x4s) on top as a base. If building a traditional gabled shed, compact the soil and lay down gravel for drainage before setting up the frame.
  3. Frame Assembly: Use 2x4 studs for the walls of your lean-to or gabled shed to create a strong framework. Secure these with galvanized screws and joist hangers if using pressure-treated lumber. For an A-frame, use metal framing connectors for added stability.
  4. Exterior Siding: Install siding after securing the frame. Use cedar wood planks or composite materials for durability in outdoor settings. Apply a moisture-resistant primer followed by two coats of exterior paint to protect against weathering and enhance aesthetics.
  5. Roof Installation: Attach roofing material—vinyl, shingles, or metal—based on your region’s climate and design preference. Use screws designed for use with the specific type of roof you’ve chosen (e.g., EPDM nails for vinyl).
  6. Door and Window Installation: Install a door with a sturdy frame to secure your shed. Windows are optional but can be added later if needed, using window frames that match your siding material.
  7. Cleaning and Sealing: After construction is complete, clean the exterior of any dust or debris. Apply a water sealant on the wood siding for extra protection against moisture intrusion.

By following these steps, you’ll be well on your way to building an efficient and attractive garden shed that fits perfectly into your backyard storage needs.

Garden Shed Ideas

Small Outdoor Space Solutions

Transforming a small backyard into a functional storage space can be easier than you think with just the right shed design. A simple shed offers more than just extra room to store tools and outdoor gear; it’s also a stylish addition that enhances your garden landscape.

Small Outdoor Space Solutions

When choosing a location for your shed, consider the available space in your backyard. A simple design ensures you maximize the utility of your small outdoor area without taking up too much ground space. Start by planning where it will fit best—perhaps against an existing fence or wall to save on space and provide support.

For simplicity’s sake, opt for a basic shed shape: rectangular or gabled. This design is straightforward to build and maintain. Choose a color that blends with your garden but stands out enough to be seen as part of the landscape. Consider using earthy tones like brown, green, or gray to tie into the natural surroundings.

When it comes to materials, choose durable, low-maintenance options such as pressure-treated lumber for framing and exterior-grade plywood for walls. These choices ensure your shed can withstand the elements while remaining easy to care for over time.

Backyard Storage Solutions

Now that you’ve got a spot picked out, let’s talk about storage solutions inside your new backyard shed. Start by designing shelves and hooks tailored to common items like ladders, garden tools, or firewood.

Garden Shed Ideas

For inspiration, consider how a garden shed can double as a small office space for writing, crafting, or even hosting casual gatherings. Adding a couple of windows and a door with glass panels can make your shed feel more inviting.

Let’s dive into the details of setting up your simple backyard shed for maximum storage utility:

  1. Start with a layout plan: Sketch out where you want to place shelves and hooks. Consider grouping items logically—like keeping tools near their use area or organizing garden supplies by season.
  2. Incorporate adjustable shelving: Invest in sturdy adjustable shelves that can be easily rearranged as your storage needs change. This flexibility is key for maximizing space efficiently.
  3. Hang hooks strategically: Use hooks to hang items like brooms, rakes, and other long tools. Mounting them at different heights allows you to use vertical space effectively.
  4. Add a rolling cart: A small rolling cart or trolley can serve as a mobile storage solution for items that get used frequently but don’t need to stay in the shed permanently. This keeps your shed tidy and accessible.

This setup ensures you have an organized, efficient storage area within your simple shed, making it easier to find what you need quickly while keeping everything well-ordered.

Final Thoughts

To conclude our guide on simple shed pictures for backyard storage solutions, remember these three key points:

  • Start with a clear plan. Measure your space carefully and sketch out your ideas to avoid costly mistakes later.
  • Select the right materials. Invest in high-quality lumber and fasteners that will last through rain and sun, ensuring durability for years to come.
  • Safety first! Always wear protective gear when handling power tools or lifting heavy objects. Safety should always be your top priority.

Nightly, take a small step towards building by gathering your basic supplies and sketching out the layout of your shed on paper. This will give you a head start before you begin construction. Happy building!

Share:

Shed Foundation Options: Concrete Slab or Piers?

shed foundation options: Introduction

When it comes to building a shed in your backyard, one of the crucial decisions you'll face is choosing between concrete slab or pier foundations. This guide aims to help you understand both options and their implications for your shed's stability and maintenance. Whether you're looking into DIY shed construction or hiring professionals, knowing the pros and cons can make all the difference in ensuring a solid foundation for your outdoor space.

In this article:

Introduction

When constructing your new shed, one of the first decisions you’ll need to make is what type of foundation it will have. Two primary options are available: concrete slabs and piers.

  • Concrete Slab: This involves laying a flat layer of concrete directly on the ground or over a compacted base. It's simple, cost-effective, and provides a stable platform for your shed. However, it may not offer as much flexibility in terms of leveling compared to piers.
  • Piers: These are individual concrete pillars that support the weight of the shed above ground level. Piers provide more flexibility when it comes to leveling and adjusting the shed's alignment during installation. They also allow for better drainage, which can prevent water from accumulating around your foundation.

The choice between a concrete slab or piers will depend on factors such as the type of soil you have, the intended use of the shed, and your personal preferences regarding cost and ease of construction.

Concrete Slab Details

A concrete slab is one of the most popular choices for sheds because it provides a solid, level surface that can support the weight of your shed structure effectively. The process to create a concrete slab foundation involves several steps: 1. Site Preparation: Begin by clearing the area where you plan to build your shed and ensuring there are no obstacles or underground utilities that could interfere with the construction. 2. Layout and Marking: Lay out the dimensions for the shed on the ground using stakes and strings, making sure it is level and square. Mark these dimensions clearly. 3. Forming the Slab: Construct forms around your marked area to create a boundary for the concrete slab. This will define its shape and size. 4. Mixing Concrete: Mix the concrete according to the recommended proportions of cement, sand, and gravel or aggregate. Stir well until it is smooth. 5. Pouring and Smoothing: Pour the mixed concrete into the forms and use a tamper to compact it evenly. Smooth the top surface with a long straight edge to ensure an even finish. 6. Curing: Cover the slab after pouring, preferably with burlap or a plastic sheet, to keep the surface moist as it cures. This process helps prevent cracking and ensures proper hydration of the concrete over several days. The benefits of using a concrete slab foundation include its durability, stability under heavy weights, and ability to provide a flat platform for your shed’s base. However, it requires more effort in terms of site preparation and construction compared to piers.

Piers Explained

When building a shed, one of the primary considerations is how to lay its foundation. Piers are often chosen as an option for this purpose, offering several advantages over concrete slabs in certain situations.

  • What Are Piers? A pier is essentially a vertical post that supports the weight of your shed. It's typically made from treated wood or metal and is embedded into the ground to provide stability.

The structure works by distributing the weight of the shed across multiple points, rather than concentrating it on one area as with a concrete slab. This method can be particularly beneficial if you're building on an uneven surface or in areas prone to high winds.

  • Advantages of Using Piers:

1. Ease of Installation: Installing piers is generally easier than pouring a concrete slab, especially for DIY shed builders. You can simply set the piers in place and anchor them securely.

2. Cost-Effective: Piers often cost less to install compared to the material needed for a large concrete slab. This makes them an attractive option for those on a budget or with limited resources.

3. Flexibility in Ground Conditions: Piers work well in various soil conditions, making them suitable for sheds built in different geographic regions and climates. They can adapt to slight shifts in the ground without causing issues like cracks or settling.

4. Wind Resistance: The distribution of weight across multiple points provided by piers makes them a good choice for areas with high wind speeds, as they are less likely to be blown over than a shed sitting on a solid concrete slab.

In summary, while piers may not be suitable in every situation due to their limited load-bearing capacity compared to large concrete slabs, they offer practical advantages that make them a viable option for many shed construction projects. Always consider the specific needs and conditions of your location before choosing between piers or other foundation options.

Pros & Cons Comparison

When constructing a shed, choosing the right foundation is crucial to ensure stability and longevity of your structure. There are two primary options: concrete slabs and piers.

Concrete Slab Pros: 1. Ease of Installation: Concrete slab foundations can be poured quickly with minimal equipment. 2. Cost Efficiency: Often more affordable than pier foundations, especially for larger sheds or multiple structures. 3. Load Distribution: The entire weight of the shed is evenly distributed over a broad base area.

Concrete Slab Cons: 1. Limited Flexibility: Once concrete cures, it cannot be adjusted if settling occurs later on. 2. Water Sensitivity: Concrete can crack under water exposure or frost conditions. 3. Potential for Movement Issues: If not properly compacted and levelled, the slab can shift over time.

Piers Pros: 1. Flexibility & Adjustment: Piers can be added, removed, or adjusted if settling is detected after construction. 2. Improved Drainage: The space between piers allows water to flow underneath, reducing the risk of flooding and rot in the shed's foundation. 3. Better Load Distribution with Deeper Foundations: For deeper pier foundations, you might distribute the load more effectively.

Pier Cons: 1. Costly Installation: Piers require more labor and materials compared to a concrete slab. 2. Complex Setup: Proper placement of piers requires careful planning and excavation, which can be time-consuming. 3. Structural Stability: If not installed correctly or with sufficient spacing, piers might not provide the same level of stability as a solid concrete slab.

Both options have their merits depending on your shed's size, location, and specific needs. For DIY projects, it’s essential to weigh these factors against each other to make an informed decision that ensures both durability and cost-effectiveness.

DIY Shed Building Tips

When building a shed, selecting the right foundation is crucial for its stability and longevity. Whether you opt for a concrete slab or piers depends on your specific needs and preferences. Here are some DIY tips to help you decide which option might be best:

  • Concrete Slab: A concrete slab provides an even, flat base that can support the weight of heavy materials like shed doors and tools. It's ideal for sheds with a standard footprint without any overhang or roof features that require deeper footings.

To create a concrete slab foundation, first ensure your ground is level and free from debris. Mix enough concrete to cover an area roughly 6 inches thick around the perimeter of your shed. Once set, you can lay wooden skids on top for the shed base.

  • Piers: Piers offer greater flexibility in terms of elevation adjustment. This is especially useful if your soil is uneven or you need to adapt the shed's height due to specific landscape features like a slight slope.

To build piers, dig holes large enough for concrete blocks and place them at specified intervals around your shed footprint. Fill these with concrete until it reaches just below ground level. You can then secure wooden beams across the top of each pier as a base for the shed frame.

Pros & Cons Comparison:

Concrete Slab:

  • Pros: Provides sturdy, even support suitable for heavy materials. Easy to level and can be poured in one go.
  • Cons: Requires a large, flat area with minimal debris; requires careful leveling during pouring.

Piers:

  • Pros: Offers flexibility for elevation adjustments and can be tailored to uneven ground. Easy to adjust height as needed.
  • Cons: More labor-intensive; requires digging holes around the perimeter of your shed footprint. Can be more expensive due to additional materials required.

Ultimately, consider your shed's intended use and the terrain you're working with when choosing between a concrete slab or piers. Both options offer solid foundations for your DIY project, but each has its unique set of advantages and challenges.

Final Thoughts

To build a shed, deciding between concrete slabs or piers is crucial. The choice depends on your specific needs: concrete slabs are easier to level but require more time for curing; piers offer better drainage but need careful spacing and leveling.

The key takeaway? Consider your local conditions—wet soil may favor piers, while dry soil supports slabs. Remember, a solid foundation is vital for the longevity of your shed.

Your first small step tonight could be to measure your lot or assess its drainage issues. This will guide you in choosing between concrete slab and piers effectively.

Shed Foundation Options

Share:

Easy plans for small beginner shed projects

Conquer Your First Shed Project: Easy Plans for Beginners

Building your own shed might seem daunting, but it doesn't have to be! With a little planning and the right approach, even beginners can successfully construct a small, functional shed. This guide offers simple plans and clear steps to get you started, turning that intimidating DIY project into a rewarding experience. Forget complex blueprints and overwhelming instructions; these projects focus on ease of construction and maximum satisfaction.

Project 1: The Simple Tool Shed

This project focuses on a basic, no-frills design perfect for storing garden tools and equipment. We'll utilize readily available materials and straightforward construction techniques. The small size minimizes the complexity and allows for a weekend build (depending on your experience and pace, of course!). Think of it as a perfect stepping stone into the world of shed construction.

Materials You'll Need

Gather these essential supplies before you begin:

  • Pressure-treated lumber (4x4 posts, 2x4 framing, and 1x6 siding)
  • Sheet metal roofing
  • Concrete blocks or pier supports for the foundation
  • Screws and nails (appropriate sizes for your lumber)
  • Level, measuring tape, saw (circular saw or hand saw), hammer, drill, screwdriver

Construction Steps

Follow these straightforward steps to build your simple tool shed:

  1. Prepare the foundation: Set your concrete blocks or pier supports level on the ground, ensuring a solid and stable base.
  2. Construct the frame: Build a simple rectangular frame using 4x4 posts and 2x4s, securing the corners with screws and brackets.
  3. Add the walls: Attach 2x4 studs to the frame, creating the wall structure. Then, attach your chosen siding material.
  4. Install the roof: Build a simple gable roof using 2x4s and your chosen roofing material. Remember to ensure proper overhang for water runoff.
  5. Add the door: Install a pre-hung door, or build a simple door frame and hang a door of your choosing.

Project 2: The Charming Mini-Shed

If you want something even smaller and more aesthetically pleasing, consider building a mini-shed. This project is ideal for storing smaller items, like potting supplies, outdoor cushions, or even as a charming addition to a garden. Its smaller footprint means less material and less labor, making it perfect for beginners seeking a quick and delightful build.

Key Differences from Project 1

This project largely mirrors the process of Project 1, but on a significantly smaller scale. You̢۪ll use less lumber and might choose to use lighter materials for easier handling. Consider using plywood for the walls and roof, which simplifies construction and adds a clean look. A simple lean-to roof is also an excellent option for this mini-shed.

Tips for Success

Remember these key points for a smooth building experience:

  • Plan your layout carefully: Measure twice, cut once! Accurate measurements are crucial for a structurally sound shed.
  • Work in stages: Break down the project into manageable steps to avoid feeling overwhelmed.
  • Ask for help: Don't hesitate to enlist a friend or family member for assistance with heavier tasks.
  • Take your time: Rushing can lead to mistakes. Enjoy the process and take pride in your handiwork.

Building your first shed is a fantastic achievement. These simple plans are designed to empower you, the beginner builder, to take on a DIY project with confidence and enjoy the fruits of your labor â€" a functional and personalized shed!

Share: